His father is from Iceland, and we joke about him being a Viking, so I decided that I was going to make little Logan a Viking helmet, right down to the horns!
I sewed the gray pieces together with a slight overlap, and then sewed two of the brown pieces over the center seam. I also sewed 3 of the strips along the bottom of the hat (i ended up trimming them a little to make them more even thirds).
Once I finished the main hat part, I cut the two horns out of the white felt. I folded the felt in half, then cut it so tat part of the horn was on the seam, so that way there wasn't a huge seam down the outside of the horn, and to make it a little more round.
Before turning them right side I cut out the valleys and notched the hills (which is a FAB idea i read about here)
Notched hills
Cut valleys. Its hard to see where I cut because of the felt.
Once I had done my cutting and notching, I flipped the felt horns right side out, and stuffed them with fiberfill.
Now came the fun part. Trying to attach the horns to the hat.
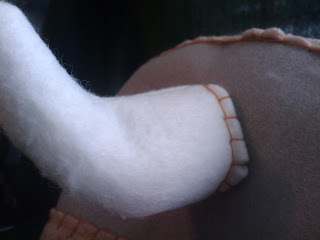
What I ended up doing was cutting 4 little slits in the bottom of the horns and then folding the flaps in (to make a solid, flat bottom). Then I took out the trusty needle and thread, and sewed those suckers on!
Finished horns
To add a little detail, I did a blanket stitch all the way around the horns, top and bottom (it also gave some strength to the horns), and sewed on 2 little buttons that I had found that looked like rivets to me.
I really love these little buttons!
And here is the finished product!!
I am SO happy with how it came out! Since he can grow into it a little, I know hes got plenty of time to play with it (as it was, I had a heck of a time getting Zach to take it off!).
Heres the only pic I could get of the little cutie with it on. He snatched that thing off as quickly as he could (as soon as his mommy let go of his hands lol).
This is the first hat I've ever made, so it was definitely a learning experience, but I am totally thrilled with it and I know I'll be making more!
Happy Friday-eve y'all!
~~Love~~
~~GG~~


No comments:
Post a Comment